Uninstall Information
At Driver Whiz, your customer sanctification is our number one priority. We understand that our software may not resolve every driver update case out there so we’ve made the uninstall process easy and convenient for you…
How do you uninstall Driver Whiz?
Uninstall Steps: 1. From the start menu, select control panel.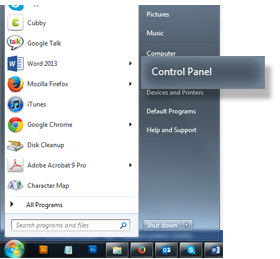
2. Under Programs select Uninstall a program.
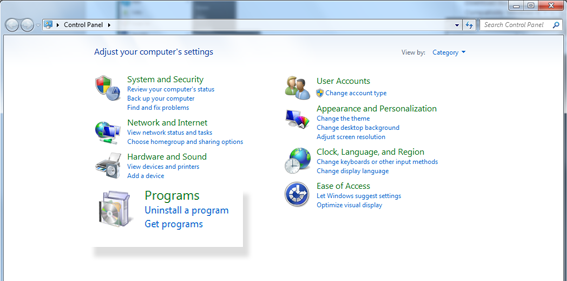
3. In the search bar type in “Driver Whiz”.

4. Select “Driver Whiz” and then click “Uninstall/Change”.

5. The user account control dialog will appear asking if “you want to allow the following program to make changes to this computer?” click “Yes” to start the uninstall process.
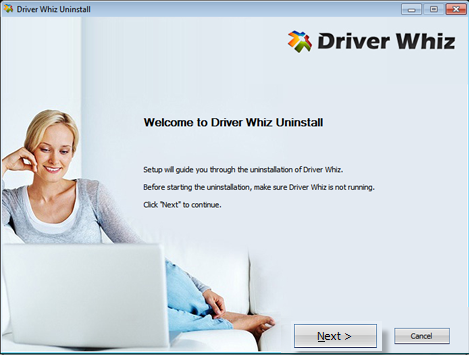
6. Click “Next” on the first dialog that appears.
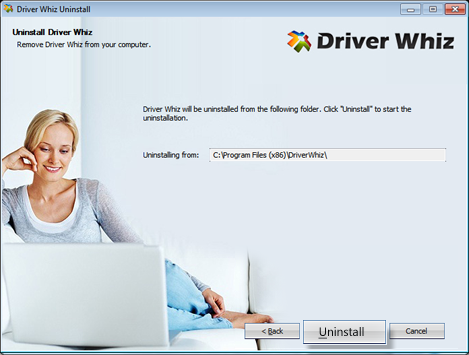
7. When the second dialog appears click “Uninstall” to remove Driver Whiz from the Program Files Folder.
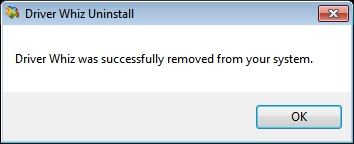
8. The diolog below will appear when the software has been removed from the program files folder. Click “OK”.
9. To complete the uninstall, select “Reboot Now” in the dialog below. Then click “Finish”.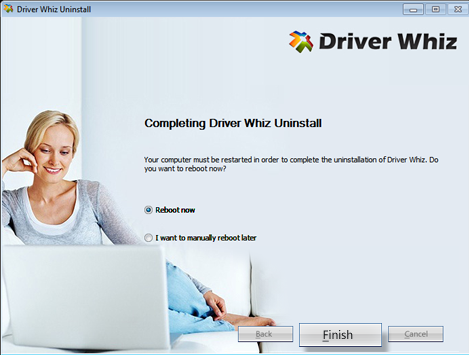
Please note a cookie containing a unique ID may remain on your computer. It can be removed via your web browser.